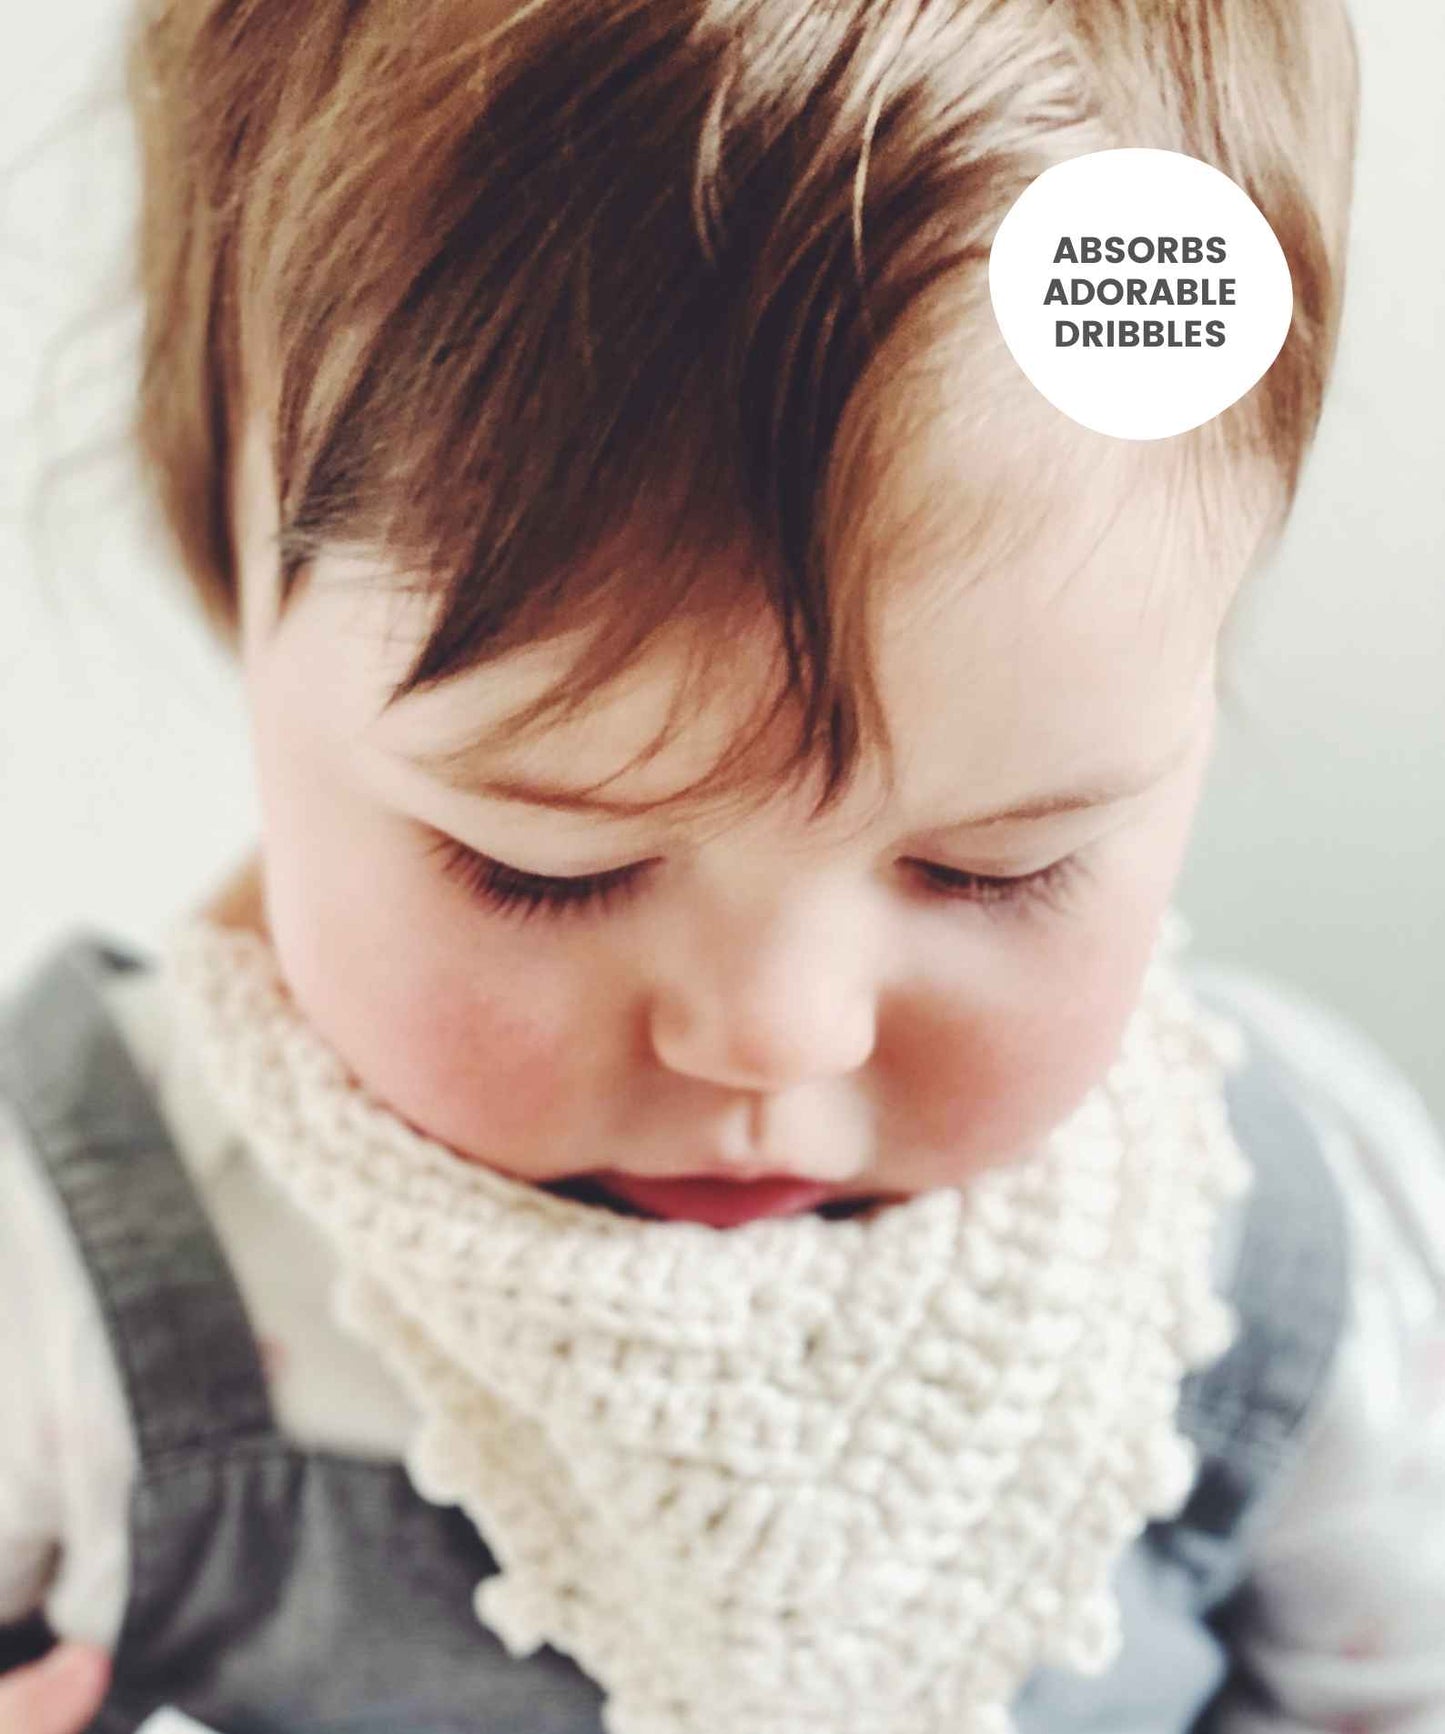

The Wheya Dribble Bib - Crochet Pattern
There’s nothing on planet earth cuter than a baby with a soggy chin who wants to give you a big gummy kiss. So let’s help the squishy little tykes out with a bib designed especially to catch their adorable drool. Enter… The Wheya Dribble Bib. A quick crochet project that does what’s needed and looks darn precious in the process.
Practical and trendy, this unisex cotton bib will soon become the go-to accessory for your gorgeous little ones. Ideal for use during teething, to catch and wipe the dribbles and to keep chins, necks and clothes dry.
And the best news? It’s made in one single piece. It’s SO satisfying how quickly it grows! Now for the bonus on top of the bonus… there’s only one end to weave in. Simply stitch over the tail from the start, and use the tail from the end to attach the buttons!
The free crochet pattern below gives instructions for creating straps with buttons + buttonholes. The popular variation of plain long straps (for tying at the back) is outlined in the PDF pattern.
Why cotton yarn
This isn’t the first (and warning, it won’t be the last) time I hark on about cotton yarn. For this dribble bib I’d say it’s essential, with the only possible alternative being bamboo yarn – but that takes you into re-sizing territory and it’s also a little shiny/silky for an item you want to be absorbent. So cotton it is.
It gives you hard-wearing, it gives you long-lasting, it gives you machine washable (be sure to securely weave in your ends), it gives you softness, it gives you hypoallergenic, it gives you absorbency, it gives you colour variety, it gives you affordability. YES I wrote that list while doing JVN's voice in my head.
The materials you'll need to make your dribble bib
Some links are affiliate, meaning I may make a small commission if you make a purchase, but this is at no cost to you.
- 30g / 50m aran (worsted) weight cotton yarn
- 5mm crochet hook
- 1 or 2 buttons (approx 2cm diameter)
- Tapestry needle
- Stitch Markers
- Scissors


The stitches + techniques you’ll need
If you're a total beginner to crochet, you may like to check out my Getting Started playlist. It's designed to show you the absolute basics to get you going with any project.
Please note this blog pattern uses UK crochet terminology.
htr – half treble (US half double):
tr – treble crochet (US double crochet):
Some notes before you begin making the dribble bib
This free pattern here on the Sarling Studio blog is a sample of the full PDF pattern available here. The full pattern;
- also gives instructions for adding long straps to tie your dribble bib with a bow
- can be downloaded in UK or US crochet terms
- includes detailed step by step pictures
- can be purchased on Etsy or on Ravelry if you prefer

Additional Useful Pattern Info
- Just in case you missed it above, this blog pattern is written in UK crochet terminology.
- This pattern produces a dribble bib which measures approximately 42cm x 14cm. It is designed to be a dribble bib for little ones while they’re teething, so around 5 months+.
- In the pattern table below, the column on the right is the number of stitches each row should have.
- We’ll never work into the turning chains, and we don’t count them in the stitch rows.
- At the end, leave a longer tail when you cut off your yarn, as we’ll use it to stitch on the buttons.
- This pattern has one buttonhole and two buttons to give flexibility of size and for ease of putting it on and taking it off. The PDF includes instructions for altering this to have two buttonholes and one button, or long straps you tie in a bow.
- Keep your tension consistent to avoid your dribble bib curling. If your bib does curl, you can always block it when you’re done.
Dribble Bib Crochet Pattern
If you skipped straight here, I applaud your confidence and feel I should let you know this pattern is written in UK crochet terms. The PDF is available in USA crochet terms.
| Foundation | Ch2, dc3 into 2nd chain from hook. Ch1 turn. |
3 |
| Row 1 | Dc2 into first stitch, dc3 into middle stitch, dc2 into last stitch. Ch2 turn. |
7 |
| Row 2 | Htr2 into first stitch, 2 htr in back loops only, htr3 in next, 2 htr in back loops only, htr2 in last stitch. Ch2 turn. |
11 |
| Row 3 | Htr2 into first stitch, 4 htr, htr3 in next, 4 htr, htr2 in last stitch. Ch1 turn. |
15 |
| Row 4 | Dc2 into first stitch, 6 dc in back loops only, dc3 in next, 6 dc in back loops only, dc2 in last stitch. Ch1 turn. |
19 |
| Row 5 | Dc2 into first stitch, 8 dc, dc3 in next, 8 dc, dc2 in last stitch. Ch2 turn. |
23 |
| Row 6 | Htr2 into first stitch, 10 htr in back loops only, htr3 in next, 10 htr in back loops only, htr2 in last stitch. Ch2 turn. |
27 |
| Row 7 | Htr2 into first stitch, 12 htr in back loops only, htr3 in next, 12 htr in back loops only, htr2 in last stitch. Ch1 turn. |
31 |
| Row 8 | Dc2 into first stitch, 14 dc, dc3 in next, 14 dc, dc2 in last stitch. Ch1 turn. |
35 |
| Row 9 | Dc2 into first stitch, 16 dc in back loops only, dc3 in next, 16 dc in back loops only, dc2 in last stitch. Ch2 turn. |
39 |
| Row 10 | 19 tr, tr3 in next, 19 tr. Ch2 turn. |
41 |
| Row 11 | 20 tr in back loops only, tr3 in next in back loops only, 20 tr in back loops only, tr 1 in top of turning ch. Ch1 turn. |
44 |
| Row 12 | Dc2 into first stitch, 21 dc, dc3 in next, 20 dc, dc2 in last stitch. Turn. |
48 |
| Row 13 | *(Ch4, slst in 4th ch from hook, sk1) 2 dc*. Repeat * to * 15 more times (16 picots total) |
48 |
| Row 14 | Now working across the top of the triangle: (note: it may help later if you add a marker to the first stitch of this row) Dc another 2 into last stitch of row 13 (there should now be 3dc in this stitch), dc into top of each row across. |
35 |
| Row 15 | Now building the first strap: Extend the row with ch16 |
16 |
| Row 16 | Dc into 2nd ch from hook and each stitch across. Note: this consists of 15 stitches into chain from row 15 + 34 stitches across the top of the triangle. |
49 |
| Row 17 | Now building the second strap: Extend the row with ch16. |
16 |
| Row 18 | Note: at the end of this row we’re creating our buttonhole. Work into each stitch across as follows: Begin by dc into 2nd ch from hook, 14 dc into chain from row 17 (15 stitches) 34 dc across the top of triangle (34 stitches) 12 dc across the first strap, ch1,sk1, 2 dc. (15 stitches) Ch1 turn. |
64 |
| Row 19 | Dc into each stitch across. | 64 |
| Row 20 | Dc another 2 into last stitch of row 19 (there should now be 3dc in this stitch), then dc into each stitch across the bottom of the second strap (15 stitches) | 17 |
| Finish | Fasten off with a long tail. Using a tapestry needle, stitch the end of row 20 through the beginning of row 14 to secure the second strap to the body of your bib. Stitch carefully through the second strap (working between stitches so your yarn isn’t visible) and use your tail to attach buttons in position on the end. Weave in end securely. |
Did you enjoy this pattern?
If so, I’d love you to tag me on Insta to share your work with me! @sarling.studio